Getting all the tooling setup on your computer can be a daunting task, but thankfully getting Docker up and running on your favorite OS is straightforward with Docker Desktop.
The getting started guide on Docker has detailed instructions for setting up Docker on Mac, Linux and Windows.
Windows Note: Docker Desktop on Windows uses WSL 2 (Windows Subsystem for Linux 2) as its default backend, providing full Linux kernel compatibility and near-native speed. Ensure WSL 2 is enabled during installation.
Mac Note: In addition to Docker Desktop, macOS users can also use OrbStack — a fast, lightweight alternative to Docker Desktop that starts in seconds and uses minimal CPU and battery. You can install it via Homebrew:
Terminal window
brewinstall--caskorbstack
Both Docker Desktop and OrbStack provide the standard docker CLI and docker compose out of the box.
Once you are done installing Docker, test your Docker installation by running the following in your terminal:
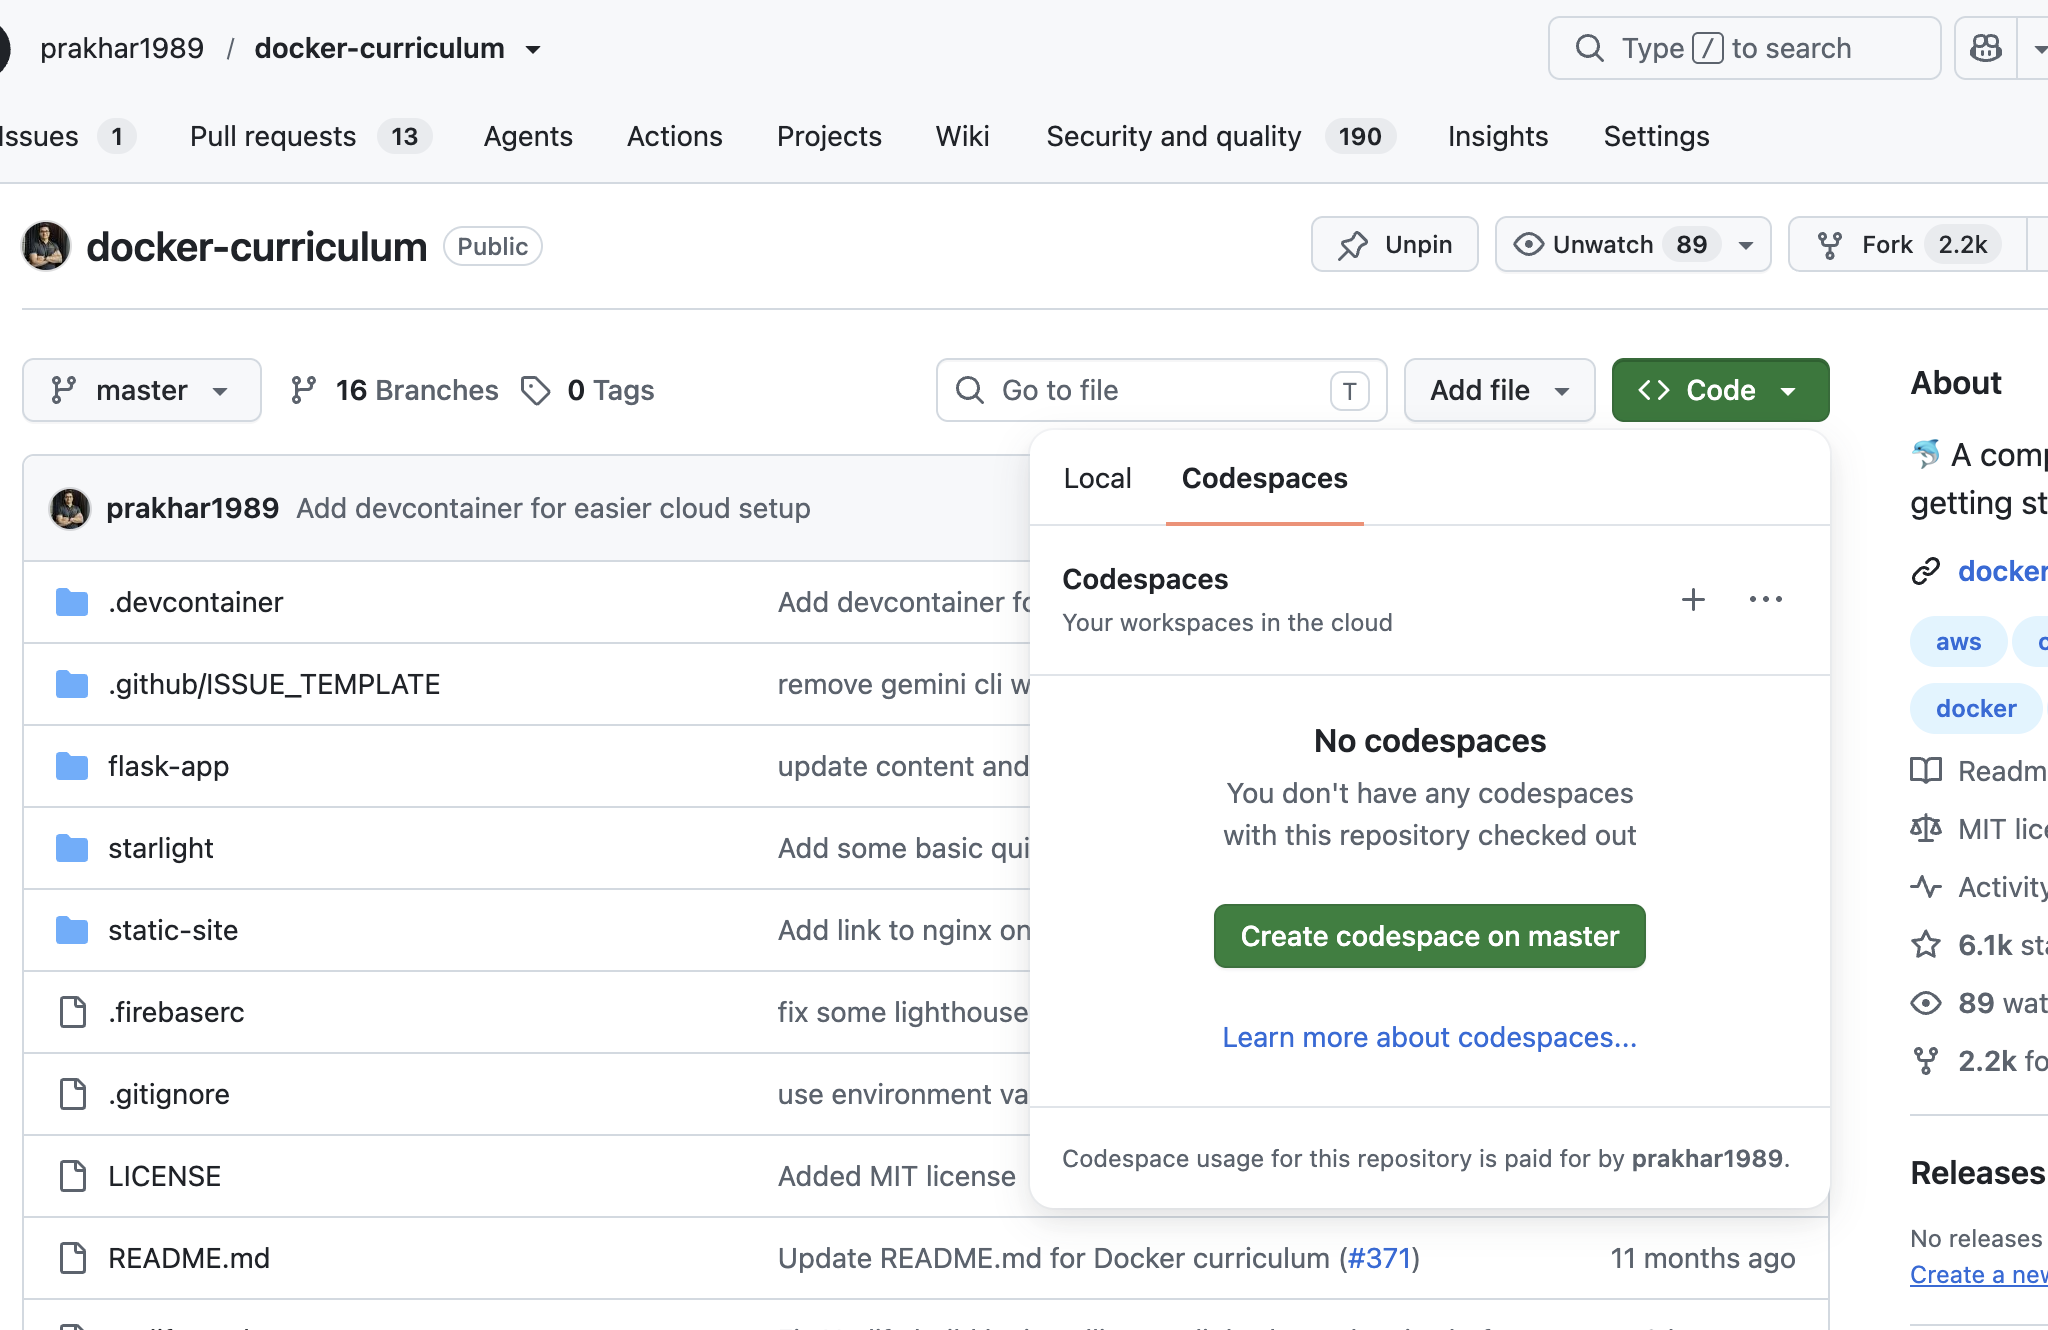
If you prefer not to configure your local development tools manually, you can launch an instant cloud development environment via GitHub Codespaces, powered by the repository’s .devcontainer configuration.
Zero Local Setup: Does not require Docker, Node.js, Python, or any developer tools installed on your computer.
Click the green Code button, select the Codespaces tab, and click Create codespace on main.
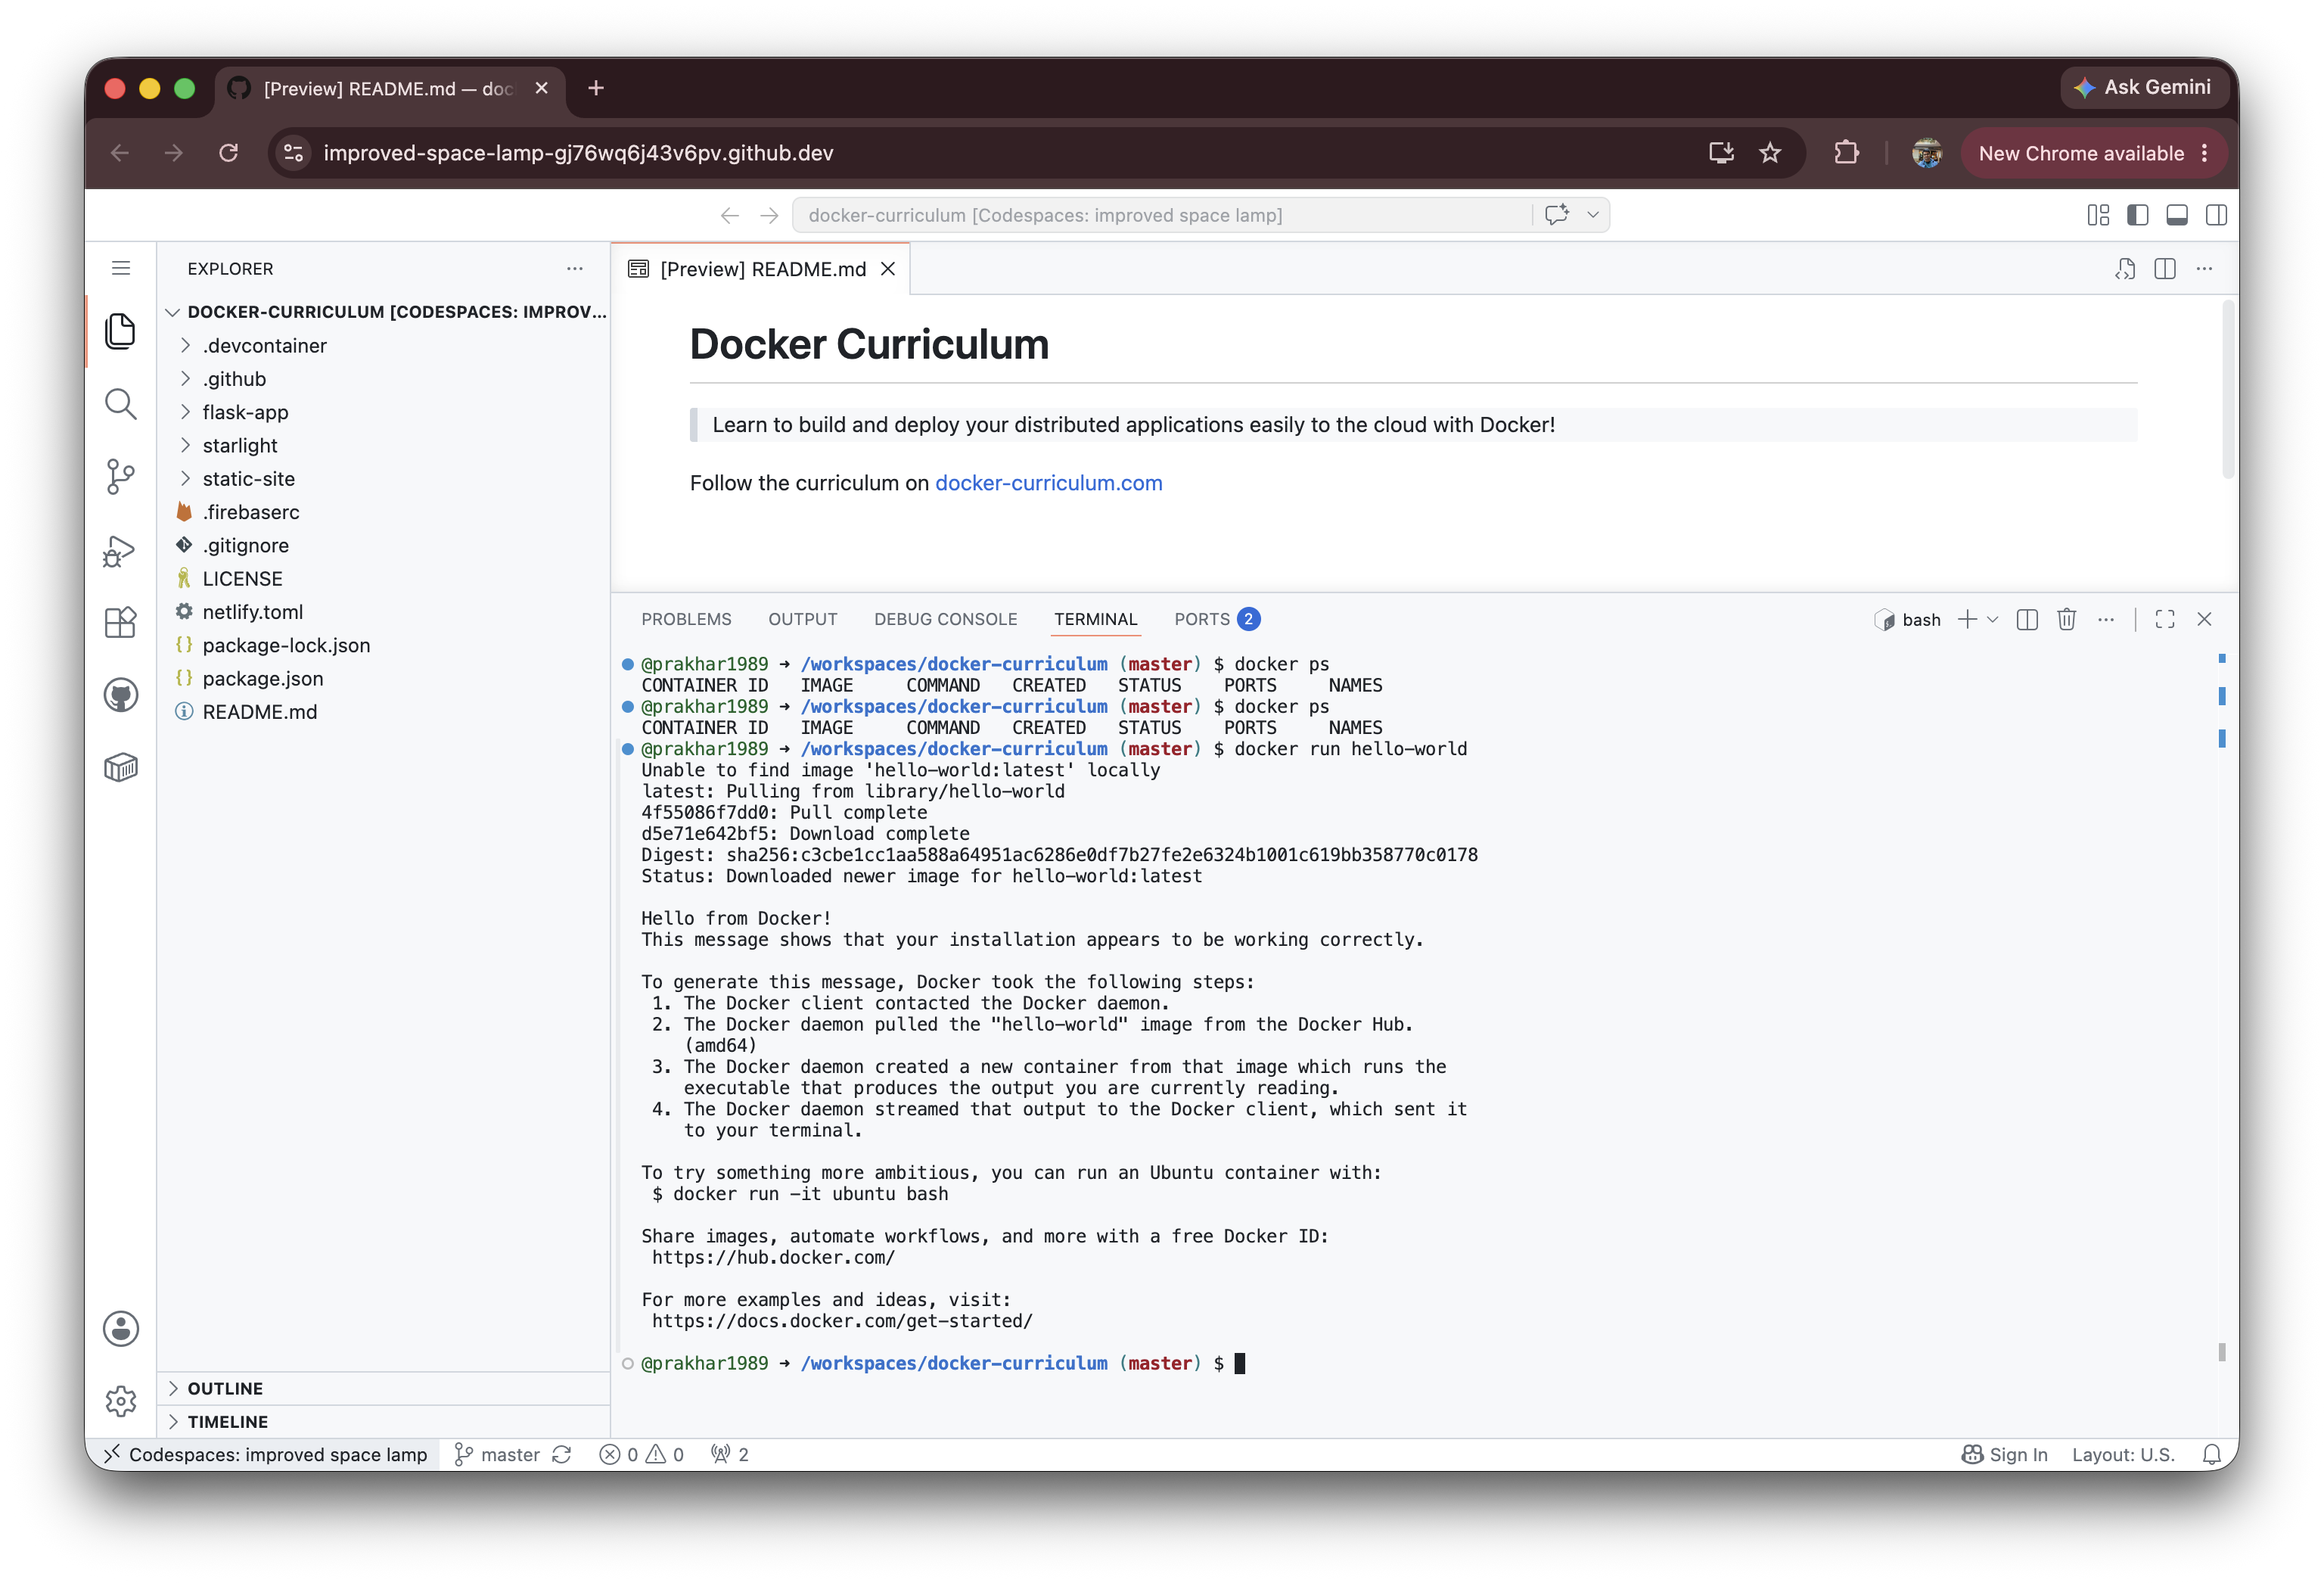
A full browser-based IDE will launch directly in your browser with Docker and Node pre-configured.
Note: On initial creation, GitHub Codespaces may take a few minutes to build the container environment, start the Docker daemon, and finish installing dependencies.
Once your Codespace launches, test Docker directly inside the browser terminal:
Terminal window
$dockerrunhello-world
Troubleshooting Tip: If docker ps or docker run reports Cannot connect to the Docker daemon, start the Docker service manually in your Codespace terminal: